Knowing how to change vCenter hostname is essential for smooth VMware management. It helps you avoid remembering complex IP addresses and ensures consistent connectivity. Whether you’ve updated your DNS records, migrated networks, or renamed your environment, changing the vCenter hostname keeps everything aligned.
In this guide, you’ll learn exactly how to change the vCenter hostname — from updating DNS entries to configuring the new name using the vCenter Appliance Management Interface (VAMI).
Table of Contents
Requirements Before You Change vCenter Hostname
Before you start the process, make sure you have:
- Access to your Domain Controller
- A functioning DNS Manager
- A bit of patience, since updates may take several minutes
Having these ready ensures the process runs smoothly from start to finish.
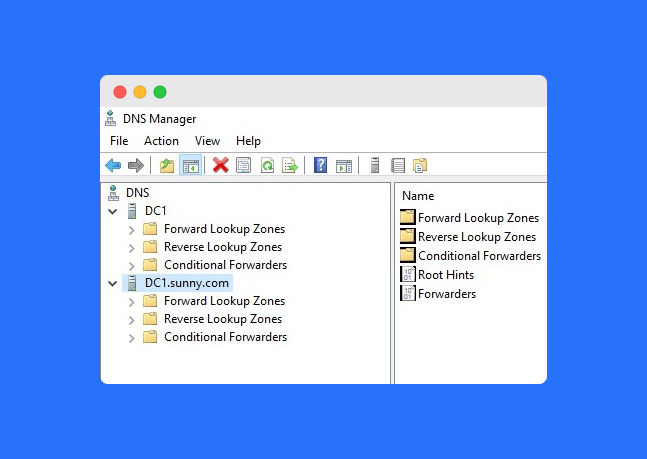
Step 1: Add a DNS Entry in the DNS Manager
The first step is adding a new DNS record.
Follow these steps:
- Log in to the Domain Controller.
- Open the DNS Manager.
- Add a new DNS entry with your desired vCenter hostname and correct IP address.
- Save the changes and confirm the new hostname resolves properly.
💡 Pro Tip: Use the
pingcommand to verify that the new hostname points to the correct IP before proceeding.
Step 2: Log In to the vCenter VAMI Page
To continue the process to change vCenter hostname, use the VAMI (vCenter Appliance Management Interface):
- Open your web browser and navigate to:
https://x.x.x.x:5480/(Replacex.x.x.xwith your vCenter IP address.) - Log in using your root credentials.
Once logged in, you’re ready to modify the hostname settings.
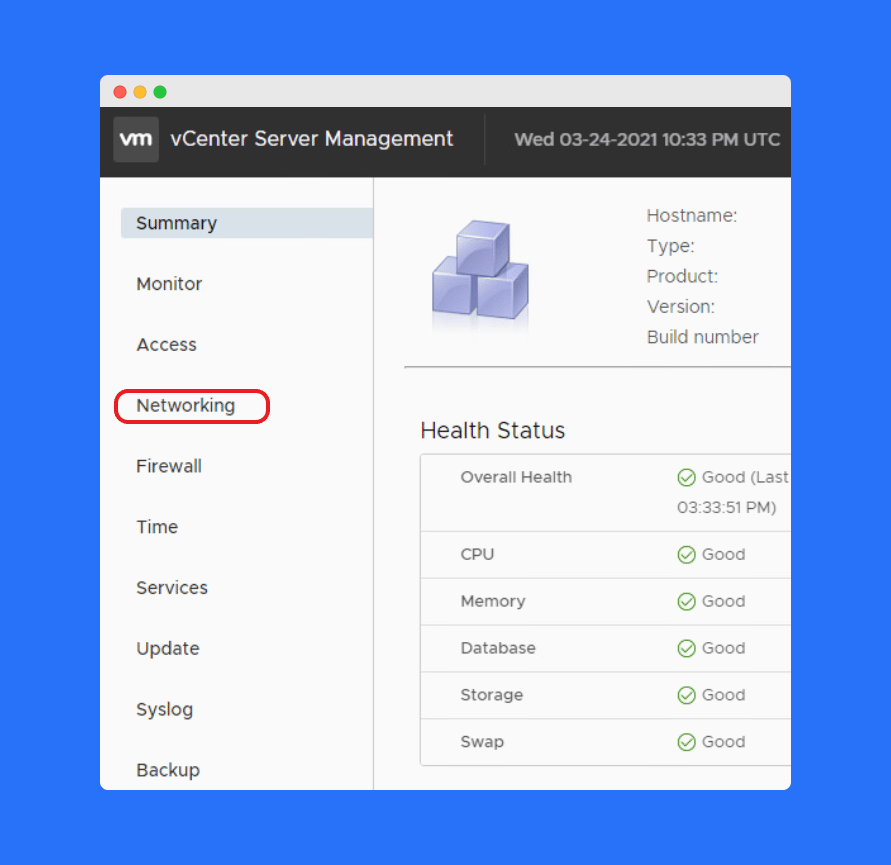
Step 3: Change vCenter Hostname in the VAMI Interface
Now it’s time to change the vCenter hostname inside the VAMI interface:
- Click Networking in the left panel.
- Select Edit under network settings.
- Click Next until you reach the Hostname section.
- Enter the new hostname that matches the DNS entry you just created.
- Click Finish to apply the change.
The update usually takes 5–10 minutes. After completion, your vCenter will start using the new hostname automatically.
Step 4: Verify the Hostname Change
After you change vCenter hostname, verify the configuration:
- Access the vCenter using the new hostname in your browser.
- Ping the new hostname to confirm DNS resolution.
- Ensure all vCenter services start correctly and respond as expected.
If any issues occur, double-check your DNS configuration or try restarting the vCenter services.
Frequently Asked Questions (FAQs)
You should change vCenter hostname to make management easier and ensure proper DNS resolution within your VMware environment.
The process usually takes 5–10 minutes, depending on your system performance and DNS propagation speed.
No. To change vCenter hostname, you must have access to the DNS Manager to create or update the DNS entry.
If you don’t update DNS first, vCenter won’t recognize the new hostname, leading to connection or service failures.
Most of the time, vCenter automatically restarts services after the update. A manual restart is rarely required.
Conclusion
Learning how to change vCenter hostname helps simplify your VMware environment and improve access management. Always update DNS first, use the VAMI interface for hostname changes, and confirm everything works after the process completes.
Once done, you’ll have a properly configured and accessible vCenter system that’s easy to manage and reliable for daily operations.